Spring BootでSpring Securityを使う場合はauto-configurationで様々な設定が自動で行われ、そのサマリは 公式ドキュメントにある。よくあるForm認証はそこに設定を追加・修正で行う。また、デモ・開発用の設定が最初から有効なので何も設定無しでも一応の動作を確認できる。
以下のドキュメントはspring-security-6.0.2をベースにするため、以前のバージョンと比べて書き方が色々と変更されている点に注意が必要。詳細は以下の記事を参照*1。
目次
プロジェクトの作成と動作確認
Spring Initializr でプロジェクトのひな形を作成する。lombok, devtool, web, security, thymeleafあたりを追加する。
plugins {
  id 'java'
  id 'org.springframework.boot' version '3.0.4'
  id 'io.spring.dependency-management' version '1.1.0'
}

group = 'com.example'
version = '0.0.1-SNAPSHOT'
sourceCompatibility = '17'

configurations {
  compileOnly {
    extendsFrom annotationProcessor
  }
}

repositories {
  mavenCentral()
}

dependencies {
  implementation 'org.springframework.boot:spring-boot-starter-security'
  implementation 'org.springframework.boot:spring-boot-starter-thymeleaf'
  implementation 'org.springframework.boot:spring-boot-starter-web'
  implementation 'org.thymeleaf.extras:thymeleaf-extras-springsecurity6'
  compileOnly 'org.projectlombok:lombok'
  developmentOnly 'org.springframework.boot:spring-boot-devtools'
  annotationProcessor 'org.projectlombok:lombok'
  testImplementation 'org.springframework.boot:spring-boot-starter-test'
  testImplementation 'org.springframework.security:spring-security-test'
}

tasks.named('test') {
  useJUnitPlatform()
}
mainを作成する。
@SpringBootApplication
public class SpringSecurityMain {
  public static void main(String[] args) {
    SpringApplication.run(SpringSecurityMain.class, args);
  }
}
spring-bootを起動して http://localhost:8080/ 以下の適当なURLにアクセスすると http://localhost:8080/login にリダイレクトされて以下のようなログイン画面が表示される。
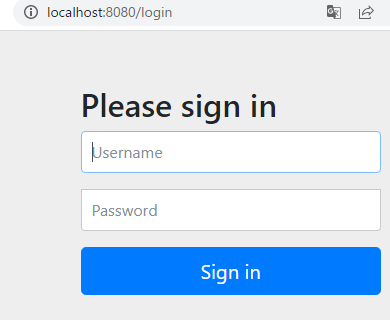
usernameはuser、passwordは起動時に以下のログのようにランダム生成される。
Using generated security password: 1ca8dbe5-ae79-4737-97c3-aead7ec1f2b3

This generated password is for development use only. Your security configuration must be updated before running your application in production.
ログインに成功すると http://localhost:8080/?continue にリダイレクトする。デフォルトだと画面が無くてエラーになるので、例えば以下のように"/"に対するマッピングとsrc/main/resources/templates/top.htmlを用意すればログインと認証正常終了までの動作が確認できる。
@Controller
public class AuthenticationController {

  @GetMapping("/")
  public String success() {
    return "top";
  }
}
<!DOCTYPE html>
<html xmlns:th="http://www.thymeleaf.org">
  <body>
    top
  </body>
</html>
ランダムパスワードの生成ではなく、固定値にするには以下のようにプロパティファイル src/main/resources/application.properties で指定する。以下のようにすると、username:username, password:password になる。
spring.security.user.name username
spring.security.user.password password
これでspring-securityのひな形の動作確認は完了。あとはプロジェクトごとに合わせた各種設定変更をする。
Form認証の設定
認証関連URLの変更
認証関連のURLなどの設定変更を行う。
設定クラスを作成する。
import org.springframework.context.annotation.Bean;
import org.springframework.context.annotation.Configuration;
import org.springframework.security.config.annotation.web.builders.HttpSecurity;
import org.springframework.security.config.annotation.web.configuration.EnableWebSecurity;
import org.springframework.security.web.SecurityFilterChain;

@Configuration
@EnableWebSecurity // 1
public class SecurityConfig {

  @Bean
  public SecurityFilterChain securityFilterChain(HttpSecurity http) throws Exception{
    http.formLogin(login -> login // 2
        .loginProcessingUrl("/authenticate") // 3
        .loginPage("/login") // 4
        .defaultSuccessUrl("/") // 5
        .failureUrl("/login?failed") // 6
        .permitAll() // 7
    ).authorizeHttpRequests(authz -> authz
        .anyRequest().authenticated()
    );
    return http.build();
  }
}
- 設定クラスに
@Configurationと@EnableWebSecurity*2を付与する。 - フォーム認証設定を有効化。
- フォーム認証のPOST先URL。ログイン画面のformのPOST先はこのURLになる。
- ログイン画面のURL。
- 認証成功時のリダイレクト先URL。
- 認証失敗時のリダイレクト先URL。この設定の場合
?failedを見て各種表示分けなどをする。 failureUrl(String),getLoginPage(),getLoginProcessingUrl()のURLは未認証でもアクセス可能にする。
次に、ログイン画面と認証成功後の画面表示用のハンドラーを作成する。
@Controller
public class AuthenticationController {

  @GetMapping("/login")
  public String login() {
    return "login";
  }

  @GetMapping("/")
  public String top() {
    return "top";
  }
}
ログイン画面 src/main/resources/templates/login.html を作成する。公式ドキュメント のサンプルコードをコピペして先述の SecurityConfig の設定と合うよう修正をしている。
<!DOCTYPE html>
<html xmlns="http://www.w3.org/1999/xhtml" xmlns:th="https://www.thymeleaf.org">
  <head>
    <title>Please Log In</title>
  </head>
  <body>
    <h1>Please Log In</h1>
    <div th:if="${param.failed}">
      Invalid username and password.</div>
    <div th:if="${param.logout}">
      You have been logged out.</div>
    <form th:action="@{/authenticate}" method="post">
      <div>
      <input type="text" name="username" placeholder="Username"/>
      </div>
      <div>
      <input type="password" name="password" placeholder="Password"/>
      </div>
      <input type="submit" value="Log in" />
    </form>
  </body>
</html>
loginProcessingUrl に対してusernameとpasswordをPOSTするフォームを作成する。厳密にはCSRFトークンの送信も必要だがThymeleafのformを使う分には気にする必要が無いのでここでは割愛する。
認証成功時の画面 src/main/resources/templates/top.html を作成する。
<!DOCTYPE html>
<html xmlns:th="http://www.thymeleaf.org">
  <body>
    top
  </body>
</html>
http://localhost:8080/login でログイン画面が表示されて正常に認証されてtop.htmlが表示されればOK。
フォーム認証のパラメータ名を変更
ログイン画面のform要素のIDとパスワードのパラメータ名はデフォルトではそれぞれusernameとpasswordなのでこれを変更するには以下にする。
    http.formLogin(login -> login
        .usernameParameter("i")
        .passwordParameter("p")
        // 省略
ログアウト
デフォルトでは/logout にPOSTするフォームによりログアウトできる。CSRFトークンについてはログインフォームと事情は同様なのでそれについては割愛。
<!DOCTYPE html>
<html xmlns:th="http://www.thymeleaf.org">
  <body>
    top
    <form th:action="@{/logout}" method="post">
      <input type="submit" value="log out">
    </form>
  </body>
</html>
ログアウトのURLの変更などは以下で行う。以下は代表的な設定例。
    http.formLogin(login -> login
      // 省略
    ).logout(logout -> logout
        .logoutUrl("/custom-logout") // 1
        .logoutSuccessUrl("/login?logout-success") // 2
        .permitAll() // 3
        .invalidateHttpSession(true) // 4
        .deleteCookies("sample.cookie") // 5
    ) ...
- ログアウトのPOST先URL。
- ログアウト成功時のリダイレクト先URL。
logoutSuccessUrlとlogoutUrlのURLは未認証でもアクセス可能にする*3。- trueにするとログアウト時に
HttpSession.invalidate()を実行する。 - ログアウト成功時に削除したいcookie名を指定。
更に細かい制御をしたい場合は logoutSuccessHandler を指定する。これを指定するとlogoutSuccessUrlが無視される点に注意。
    ).logout(logout -> logout
        // 省略
        .logoutSuccessHandler((request, response, authentication) -> System.out.println(authentication))
リダイレクトのdefaultSuccessUrlとフォワードのsuccessForwardUrl
タイトルままだが、認証成功後にリダイレクトするかフォワードするかの違いがある。両者の違いの詳細は省略するがログイン成功後にブラウザに表示されるURLが異なる。
| 設定 | URL |
|---|---|
.defaultSuccessUrl("/") |
/ |
.successForwardUrl("/") |
/authenticate |
successForwardUrlの場合、成功後の遷移先は以下のように"/"をGETでなくPOSTの必要がある。/authenticateへのPOSTを"/"にフォワードするため。
@Controller
public class AuthenticationController {
  // 省略
  @PostMapping("/")
  public String topPost() {
    return "top";
  }
}
認証方法
デフォルトのForm認証アルゴリズムを簡略化して説明すると、何等かのデータソースからユーザIDを基にユーザ情報を取得してエンコードしたパスワードと比較する、となる。認証方法の変更は基本的にはこれの必要箇所を修正という形になる。ドキュメントのDaoAuthenticationProviderに動作概要の解説があるのでこちらも参照。
パスワードのエンコーダーの変更
本番環境ではパスワードは何等かのエンコードがされているため、それにマッチするパスワードのエンコーダーの設定が事実上必須となる。このためにはPasswordEncoderのbeanを作成する。以下例はformから送信されたパスワードをbcryptでエンコードして比較する。
import org.springframework.security.crypto.bcrypt.BCryptPasswordEncoder;
import org.springframework.security.crypto.password.PasswordEncoder;

@Configuration
@EnableWebSecurity
public class SecurityConfig {

  @Bean
  public SecurityFilterChain securityFilterChain(HttpSecurity http) throws Exception{
    // 省略
  }

  @Bean
  public PasswordEncoder passwordEncoder() {
    return new BCryptPasswordEncoder();
  }
}
動作確認用にはsrc/main/resources/application.propertiesのパスワードもbcryptでエンコードしたものに変更の必要がある。以下のパスワードはpをエンコードしたもの。
spring.security.user.name username
spring.security.user.password $2a$10$KkGPejeQX5gAjzWZZvITZOuNF1Fsjz3jnl8UiOTz3NBCh6E1nLo1C
デフォルトのパスワードエンコーダー
デフォルトでは複数アルゴリズムに対応可能な設定がされたDelegatingPasswordEncoderが使われる。 このクラスの役割はドキュメント に書かれている。
ユーザデータの取得方法設定
基本的にはパスワードはDBなど何等かのデータソースに格納されているので、そこからリクエストのユーザIDを基にユーザ情報を取得する設定、は基本的には必須の設定となる。これにはUserDetailsServiceのbeanを作成する。
その設定のためのインタフェースは下記で、ユーザIDからユーザ情報を取得する、を実装すれば良い事が分かる。
public interface UserDetailsService {
    UserDetails loadUserByUsername(String username) throws UsernameNotFoundException;
}
bean定義のイメージは以下の通り。
@Configuration
@EnableWebSecurity
public class SecurityConfig {
  // 省略
  @Bean
  public UserDetailsService userDetailsService() {
     return new ...
ちなみにUserDetailsServiceは下記のようにHttpSecurity#userDetailsServiceでも設定可能だが、基本的にはbean定義が良いと思われる。その理由はUserDetailsServiceAutoConfigurationのauto-configが有効になり不要なInMemoryUserDetailsManagerのbeanが生成されてしまうため。
  @Bean
  public SecurityFilterChain securityFilterChain(HttpSecurity http) throws Exception{
    UserDetailsService userDetailsService = ...

    http.formLogin(login -> login
      // 省略
    ).userDetailsService(userDetailsService);
    return http.build();
インメモリ
挙動確認のためにインメモリにユーザデータを持つ設定を作成する。これはパスワードをソースコードにベタ書きとなるため、基本的にはサンプル用で本番環境で使うことは稀と思われる。
以下の設定例はインメモリにuser, adminの2ユーザを持つ。
  @Bean
  public UserDetailsService userDetailsService() {
    UserDetails user = new User("user", "$2a$10$KkGPejeQX5gAjzWZZvITZOuNF1Fsjz3jnl8UiOTz3NBCh6E1nLo1C", List.of()); // p
    UserDetails admin = new User("admin", "$2a$10$PYUaLLme465KrFYJw/fcjuihtzLPviwors8/9XGtaQInEFlvJwaaC", List.of()); // admin
    return new InMemoryUserDetailsManager(user, admin);
  }

  @Bean
  public PasswordEncoder passwordEncoder() {
    return new BCryptPasswordEncoder();
  }
}
JDBC
RDBにユーザデータを持つ設定について。例としてmysqlを前提に進める。
implementation 'org.springframework.boot:spring-boot-starter-jdbc'
runtimeOnly 'com.mysql:mysql-connector-j'
ユーザ・認可を保持するテーブルを作成する。JdbcDaoImplにDDLのパスがある*4のでjar内の該当パスのファイルを使用する。
今回はmysqlを使用するので型を修正して以下のDDLを実行する。
create table users(
    username varchar(50) not null primary key
    , password varchar(500) not null
    , enabled boolean not null
);

create table authorities(
    username varchar(50) not null
    , authority varchar(50) not null
    , constraint fk_authorities_users foreign key (username) references users(username)
);

create unique index ix_auth_username
    on authorities(username, authority);
動作確認用の適当なユーザ・認可情報も追加しておく。デフォルトでは認可が一行も無いユーザは存在しないと見なされる。
insert into users(username, password, enabled) values ('user', '$2a$10$KkGPejeQX5gAjzWZZvITZOuNF1Fsjz3jnl8UiOTz3NBCh6E1nLo1C', true); --p
insert into users(username, password, enabled) values ('admin', '$2a$10$PYUaLLme465KrFYJw/fcjuihtzLPviwors8/9XGtaQInEFlvJwaaC', true); --admin

insert into authorities(username, authority) values ('user', 'USER');
insert into authorities(username, authority) values ('admin', 'ADMIN');
src/main/resources/application.propertiesにDB接続情報を追加する。
spring.datasource.url jdbc:mysql://localhost:13306/mysql
spring.datasource.username root
spring.datasource.password password
UserDetailsServiceの実装クラスの一つであるJdbcDaoImplのbean定義を作成する。
import org.springframework.security.core.userdetails.jdbc.JdbcDaoImpl;

@Configuration
@EnableWebSecurity
public class SecurityConfig {

  @Bean
  public SecurityFilterChain securityFilterChain(HttpSecurity http) throws Exception {
    // 省略
  }

  @Bean
  public UserDetailsService userDetailsService(DataSource ds) {
    JdbcDaoImpl jdbcService = new JdbcDaoImpl();
    jdbcService.setDataSource(ds);
    return jdbcService;
  }

  @Bean
  public PasswordEncoder passwordEncoder() {
    return new BCryptPasswordEncoder();
  }
}
これで起動してuser, pでログインできればOK。
別のテーブルを使用
既存テーブルを使用するにはユーザ・認可情報の取得SQL変更により行う。ここでは単にテーブル名をusers から my_usersに変更しただけの例を示す。ユーザのSQLはユーザ・パスワード・有効フラグの順にカラムを返し、認可は2番目に認可を返すSQLになってさえいればよい。
  @Bean
  public UserDetailsService userDetailsService(DataSource ds) {
    JdbcDaoImpl jdbcService = new JdbcDaoImpl();
    jdbcService.setDataSource(ds);
    jdbcService.setUsersByUsernameQuery("""
        select
            username
            , password
            , enabled
        from
            my_users
        where
            username = ?
                """);
    jdbcService.setAuthoritiesByUsernameQuery("""
        select
            username
            , authority
        from
            my_authorities
        where
            username = ?
                """);
    return jdbcService;
  }
独自実装
spring-securityの組み込みクラスで仕様が満たせないなら独自実装となる。たとえば、以下は何等かのユーザ情報取得APIがあると仮定してそれを使用する例。
  @Autowired
  UserApi api = new UserApi();

  @Bean
  public UserDetailsService userDetailsService() {
    return username ->
      api
        .get(username)
        .orElseThrow(() -> new UsernameNotFoundException(""));
  }
nullのreturnは禁止でユーザが見つからない場合はUsernameNotFoundExceptionをスローする。
その他
contollerで認証情報を参照
いくつか方法があるので状況に応じて使用する。
- 基本的には
Authenticationを引数に指定して適当な実装クラスにキャストする。ただしanonymousつまり未認証だとnullになる。 @CurrentSecurityContextはドキュメントを参照。こちらはanonymousでもnullを返さない。SecurityContextHolder.getContext()はドキュメントなどを参照。
ドキュメントにサンプルコード
@Controller
public class SampleController {
  @GetMapping("/foo")
  public String foo(Authentication auth) {
  }

  @GetMapping("/hoge")
  public String hoge(@CurrentSecurityContext SecurityContext context) {
    Authentication auth = context.getAuthentication();
    return "hoge";
  }

  @GetMapping("/bar")
  public String hoge(@CurrentSecurityContext SecurityContext context) {
    Authentication auth = SecurityContextHolder.getContext().getAuthentication();
    return "bar";
  }
}
ハマった点
ERR_TOO_MANY_REDIRECTS
設定内容によるが基本的にはpermitAllが無いため。無い状態で http://localhost:8080/login にアクセスすると、/loginは認証が必要なため/loginにリダイレクトされるのでループしてしまう。
参考URLなど
*1:結構変わったのをきっかけに、Form認証のよくある書き方を一度自分用にまとめようかな、という気分になった。
*2:servletの場合@EnableWebSecurityは無くても動作するが、spring-securityの設定クラスを明示するためにも付与するのが良いと思われる。https://github.com/spring-projects/spring-boot/blob/main/spring-boot-project/spring-boot-autoconfigure/src/main/java/org/springframework/boot/autoconfigure/security/servlet/SpringBootWebSecurityConfiguration.java#L75 を見るとauto-configで@EnableWebSecurityを自動付与するみたい。
*3:これをしない場合は logoutSuccessUrl が要認証となり、ここから更にログイン画面へのリダイレクトが行われる。なのでブラウザのURL欄にはlogoutSuccessUrlが表示されない。