要旨
- 簡易化されたspring-boot + Testcontainersによる結合テスト自動化は実用的である。
- 厳しいレガシーコードに現実的な対処が出来れば、結合テスト自動化は高いコストに見合うメリットが得られる可能性が高い。
目次
はじめに
ここのところspring-boot + Testcontainersによる結合テストの自動化に取り組んで来た。その内容であるとか感想であるとか色々をまとまったテキストとして書いた。レガシーコードへの導入経験がベースのため、自動化されたテストが前提の新規システムの視点から見ると、奇異な記述が多いかもしれない。私の経験ではこうだったというだけの話なので、その辺の網羅的かつ精緻な議論については参考文献に挙げた書籍を参照願いたい。
用語の定義
基本的にはテスト関連文書で使用される定義に従うが、このテキストの主題は結合テストの自動化についてなので、それに合わせて用語の意味を若干変えている。
| 用語 | 説明 |
|---|---|
| ** テスト(の自動化) | このテキストの主題は「結合テストの自動化」なので「の自動化」や「自動化された」の文言は基本的に省略する。文脈や強調が必要な場合には適宜付与する。 |
| 単体テスト | クラスやメソッドに対するテスト。ユニットテストと呼ぶ事も多いが、次の理由によりこのテキスト内ではこう呼ぶ。 |
| 結合テスト | あるシステムとそれが使用するすべてのミドルウェアを本番同等で実施するテスト。単体テストの考え方/使い方の「8.1 統合(integration)テストとは?」の定義に従う。このテキスト内ではおおむねspring-boot + Testcontainers + Oracleを意味する。インテグレーションテストと呼ぶことも多いが、長いし、単体・結合と日本語として対比させたいのでこのテキスト内ではこのように呼ぶ。 |
| E2Eテスト | このテキストでは扱わないテーマなので、結合テストよりも上位レイヤーのテスト、ぐらいの意味。 |
| テストケース | 環境(Oracleなどの前提条件)・事前条件・実行内容・事後検証などのワンセットあるいは@SpringBootTest付与クラスでテストを実行するメソッド。前者の実装が後者と言えるがこのテキスト内では厳密な区別はそこまで重要ではないのでゴッチャに使用している。 |
| テストコード | プロダクションでは無いテストに関するコードくらいの意味。@Testを付与するテストケースだけでなくspring-bootやTestcontainersのセットアップ等も含む。 |
| レガシーコード | テストコードが無いもしくは機能していない既存システムくらいの意味。参照:レガシーコード改善ガイド |
結合テストの概要
本テキストで扱う結合テストの疑似コードを以下に示す。説明用に大幅な簡略化はしているが、実際には以下を何倍にも膨らませたものになる、と考えてよい。
web-api
Oracleに対してreadのみのREST APIを想定した疑似コード。
@SpringBootTest(webEnvironment = WebEnvironment.RANDOM_PORT)
class SampleWebTest {

  @Bean
  @ServiceConnection
  OracleContainer oracleFreeContainer() {
    return new OracleContainer(DockerImageName.parse("gvenzl/oracle-free:latest"));
  }

  @LocalServerPort
  int port;

  @Autowired
  WebTestClient client;

  @BeforeAll
  static void beforeAll(
      @Autowired DataSource ds,
      @Autowired ResourceLoader loader) {
    ResourceDatabasePopulator populator = new ResourceDatabasePopulator(
        loader.getResource("classpath:init_sample.sql"));
    populator.execute(ds);
  }

  @Test
  @DisplayName("指定IDのユーザを取得")
  void test() {
    client.get().uri("http://localhost:" + port + "/user/{id}", "kagami")
        .accept(MediaType.APPLICATION_JSON)
        .exchange()
        .expectStatus().isOk()
        .expectBody().json("""
            {
              "id":"kagami"
              , "name":"hoge"
            }
            """);
  }
}
WebEnvironment.RANDOM_PORT としてるが現実的に重複しないであろう固定値でも良いかな、と最近思い始めている。
WebTestClientを使用してるがRestClientなど任意のAPIクライアントを使用してステータスコードやレスポンスのjsonをassertするでも十分と思われる。
ここでは初期データはテスト開始前に一度だけロードしている。テストケースごとに初期データを切り替える方が望ましいケースもあるだろう。データのロード方法は ResourceDatabasePopulator で明示的にSQLファイルを指定してるが、この辺の実装方法はspringだけでも色々あるので、各プロジェクトでお好みの方法になるだろう。
@DisplayNameは横着して適当なテキストになっているが、実際にはテストケース名称やサマリを記述すべきだろう。
spring-batch
Oracleに対してwriteするspring-batchを想定した疑似コード。
@SpringBootTest(properties = "spring.batch.job.enabled=false")
@SpringBatchTest
class SampleBatchTest {

  @Bean
  @ServiceConnection
  OracleContainer oracleFreeContainer() {
    return new OracleContainer(DockerImageName.parse("gvenzl/oracle-free:latest"));
  }


  @Test
  @DisplayName("正常系")
  void test(
      @Autowired DataSource ds,
      @Autowired Job job,
      @Autowired JobLauncherTestUtils jobLauncher) throws Exception {
    JdbcClient jdbc = JdbcClient.create(ds);
    jdbc.sql("truncate table ...");
    jdbc.sql("insert into ...");

    jobLauncher.setJob(job);
    jobLauncher.launchJob(
        new JobParametersBuilder()
            .addLong("run.id", System.currentTimeMillis())
            .toJobParameters());

    SomeRecord actual = jdbc.sql("select ..").query(SomeRecord.class).single();
    SomeRecord expected = new SomeRecord(123, "kagami");
    assertEquals(expected, actual);
  }
}
参照系と異なり、更新系はテストケースごとに都合の良い初期データを準備する。これもケースバイケースだが、個人的にはその方がテストを記述しやすい、と感じている。ここではJdbcClientで関連テーブルをtruncateにより空にしてから初期データ投入している。ここは実装方法は色々考えられる。初期データの分量や変更頻度に応じた工夫が必要だろう、と感じている。
結合テストの性質上、commit正常終了もテスト範囲に含めたいので、テストケース終了時にrollbackのテクニックは私は使用しない。
spring-batchのテストユーティリティであるJobLauncherTestUtilsでJobを実行し、Jobの実行後に更新先テーブルに期待通りの値が入っているか、をassertする。
疑似コードの補足
様々なテストコードの実装方法
疑似コードではspringファミリーかつ素朴な実装方法に留めている。これは個人的にはテスト用ライブラリは増やし過ぎない方が良いのでは、と感じているため。
後述するが、結合テストはどうしても様々な技術的な課題が発生して複雑になりがちである。多少見た目が不格好でも採用ライブラリがspringファミリーだけなら知識を流用できるので覚える知識量を減らせるのではないか、と考えている。もちろん、逆に有用ライブラリを積極的に採用して効率化すべきだ、もありうる意見である。この辺の塩梅はチームで合意を取れるかどうか、であろう。
外部依存のweb-apiは原則的にmock
あるシステムから呼び出す外部web-apiは原則的にはWireMock等を私は使用する。結合テスト観点では契約に従うふるまいで十分のはずで、逆に実装もテストしたいならシステム分割単位が疑わしくなる。とはいえ、その外部web-apiが自チーム内で十分コントロール可能であればその限りでは無い。RDBが自チームの持ち物でコントロール可能なら実物を用いるが、そうでないなら別のやり方を取るのと同じ理屈である。このあたりの議論は 単体テストの考え方/使い方 の「8.2 どのようなプロセス外依存をモックに置き換えるべきか?」を参照されたい。
ポジティブなこと
本番同等のミドルウェアでテストコードを書ける
開発者としての最大の恩恵はこれではないだろうか。特に、更新系を反復実行できる安心感が心強い。
個人的には、spring-batch 5の変更対応が印象深い。この変更はライブラリそのものには大きな変更は無いが使用方法が大なり小なり変更された。この対応は、少しずつ変更しながらその都度結合テストを実行する事で、安全かつ速やかに完了した。手動ならデータ準備して実行して目視確認して……とそれなりに気が重い作業だったはずで、想像以上に早く完了した事に自分でも驚いたのを覚えている。
結合テストの自動化以前ではミドルウェアに関するコードの変更は気が重いものだったが、かなり気軽に出来るものになった。軽いものだと、SQLのインデントだとかselect列の並び替えだとかStringBuilderでSQL文字列結合をtext blockに書き換え、など。こういうのは地味に障害調査時に効いてくるのであなどれない。また、結果は変わらない改善、たとえばjoinやwhereの条件を効率の良いものへの書き換え、などにも活用できる。
spring-boot + Testcontainersに関して言えば、それなりの開発者でしか導入困難な時代は越え、まぁまぁの知識があれば投資対効果を得られる段階を迎えたのではないか? と私は考えている。
私はまだデータベース・リファクタリングの域に達してないが、もし網羅的なテスト自動化が存在すれば積極的にテーブル設計を書き換える決断も容易になるだろう、と感じる。
複数種類テストの明示的な使い分け
単体テストはクラス単位の細かい条件網羅を書きやすいがフィーチャーやユースケースといった機能単位には向かず、結合テストはその逆の特徴を持つ。従って、互いの不得手を互いにカバーしあうような複数種類のテストの明示的な使い分けが容易になった。
以前から異なる観点のテスト手法の組み合わせは実施されていたが、明示的なテストコードがより細かい制御を可能にした。以前の手動テストで何となく実施していたもののうち、結合テストの自動化により、明示的に記述可能な領域が拡がった、という感覚がある。たとえ単体テストでカバーしない領域があっても結合テストでカバーすれば良い。その逆も出来る。手動テストではふんわりしてイマイチ不安だったものが、明示的なテストコードがテストの使い分けという理屈を裏付けるようになった。
普段の開発におけるメリットは、例えば、外部システムの連携部分を単体テストではなく結合テストで包括できる点があげられる。具体的には、@Contollerは結合テストで一通りの正常系テストケースといくつかの異常系を網羅すればおおよそカバーできる。単体テストでも書けなくは無いが様々なテクニックを駆使しなければならず不自然さは否めなかった。結合テストならリクエスト・レスポンスの組み合わせ、必要に応じてステータスコードやヘッダーの検証も追加、によるweb-api仕様に対応する自然な記述が出来る。
私はまだE2Eテスト自動化には取り組んでいないが、いま結合テストで無理に記述してるであろうテストケースをより効率的にバランス出来るのだろう、という期待がある。
テスト手法の改善が開発方法も改善する
テスト自動化の支援により、個人の開発だけでなくチーム全体の開発の進め方が変化していく、という実感がある。個人タスクの不安解消がチーム全体に拡大し、その影響が開発方法にも波及しているのでは、という感覚がある。
私自身の体験談としては、この規模の機能修正なら単体・結合テストが通過すれば異常は無いと見なせるため従来の手動確認は無しとする、という判断が増えた。そして、最初はおっかなびっくりでも成功体験が積み重なるにつれ個人もチームも大胆になっていく。
先にspring-batch 5対応の話が出たがspring-boot 2.x -> 3.x移行が印象深かった。単体テストで個々のクラス単位を網羅し、結合テストがweb-apiのエンドポイント単位やbatchのjob単位の挙動が壊れていない事を網羅する。まだ自動化されていないE2Eや負荷・セキュリティなどは手動確認が必要だが、手元の開発環境での作業は自分が思う以上に大幅に短い期間で完了した。テスト自動化の威力はすごいな……と感動したのを覚えている。
1000回テストしたら1000回とも同一手順を反復実行して些細な違いでも検出したら失敗する。およそ人間には困難な精度と速度でテストを反復実行し続ける。一般的に、本番リリース前にデグレ防止のための手動確認にそれなりのコストをかけるケースは多いと思うが、テスト自動化の網羅範囲が拡大していくと、個人の作業改善というよりチームのコスト削減という風に意味合いが変化していくのを感じる。さらにE2Eや負荷テストにも拡大すれば開発プロセスにも影響を与えるだろう事は想像できる。
ネガティブなこと
仕組みはかなり複雑
近年はちょっとしたwebアプリケーションでも多数の技術要素で構成され、かつ、それらを組み合わせて単一のシステムとして提供する必要がある。結合テストを自動化するには、それら構成要素と組み合わせ方をまず理解し、その上で、それらを自動実行可能な仕組みを構築の必要がある。今後どんどん隠ぺいされて構築作業そのものは容易にはなるだろうが、そもそもの複雑さは今後も軽減されないだろう。
テスト自動化を前提として設計される新規システムはともかく、レガシーコードではこの点が特に問題となる。レガシーコードをゼロから自動実行可能にするためにはあの手この手が必要になる事が多い。とりわけRDBは、Flyway等の管理やDDL等のバージョン管理が無いくらいはまだマシで、初回構築時の設定が失われてるとか、開発と本番で差がありどちらを自動化のベースにするか迷うとか、レガシーコード固有の考慮事項がいろいろ出てくる。あれこれ対処してるとそもそも複雑なテストコードが更に複雑になっていく。
私の失敗談として、あるレガシーコードに結合テストを導入する際にある初期化SQLをSYSで実行の必要があったが、CDPとPDBを取り間違えてハマった事がある。テスト対象システムを構成する技術要素の知識がまんべんなく必要だし、アプリケーション固有の知識も必要になる。
@SpringBootTestとTestcontainersを導入すれば良いだけ、と気軽な気持ちで結合テストに手を出したらテストコードの数倍の解説ドキュメントが必要なほど理解が難しい代物になってしまう、事は当然ありうる。少なくとも、結合テストの自動化はツールやライブラリを導入したらすぐ効果が出るような単純な代物では無い。
維持し続けるのも難しい
続けて私の失敗談だが、そうして気合と根性で結合テストを整備したはいいものの、ややこし過ぎて他人には修正困難な代物と化してしまった。いずれ私が去ればskip-testされる確率はかなり高いだろう。結合テストに取り組んだ事は後悔してないが、長期間維持し続けられるテスト自動化の整備の難しさを痛感した。
機構がもっと単純な単体テストですら、ビルドがなぜか通らないのでskip-test、は良く聞く事例である。それより遥かにややこしい結合テストは更に容易く捨てられるだろう事は想像に難くない。
単体テストはともかく結合テストは初期構築にも維持にもそれなりのコストを要するし、コストを上回る効果を実感するには一定期間以上の運用も必要となる。テスト自動化の威力を実感する前にテストを捨てたりサービス廃止になったりしたら幻滅するのも分かる。非技術者層に「テスト自動化は高コストの割に効果は薄い」と誤ったメッセージが伝わるのだけは避けたいものだ。
チームの能力を越えた自動化は時期尚早ではないか? と考えている。チームに地道な改善に取り組む余裕が無ければ従来通りの手動テストで良しとするのも一つの判断と思う。納期が切羽詰まってる中では予定していた自動化は後回しにする、という判断もありうる。結合テストを作るのは簡単だが、いつ作るのか・作ったとして元が取れるのか、そういう判断を下すのは難しい、という実感がある。
初期データの維持管理コスト
RDBの結合テストは初期データをロードする必要があり、機能修正に伴うテストコードの修正はこの初期データも修正が必要になる事が多いが、これがなかなかの痛みを伴う事が多い。初期データ投入手段がSQLにしろツールにしろ、そのテストケースに必要な初期データは何か? という見直し作業自体は無くならない。
テストケースの選定が難しい
これは単体テストでも同様だが、自動化用のライブラリやツールの使用方法とテストケース作成の技法は別種のスキルである。
いまソフトウェアテスト徹底指南書を読んでいるが、アンチパターンとしてCPM法(コピー&ペースト&モディファイ法)なるものを紹介している。これは「編集ボタンを押すと編集モードになる」という仕様に対して「編集ボタンを押すと編集モードになること」だけでテストケース作成を済ませる事を指す、とのこと。「不適切なテスト設計への警鐘を目的として」との記述通り、結合テストのテストケース作成の難しさが分かる。
結合テストのテストケースは過剰でも過少でも問題を生む。過少は抜け漏れを意味するので分かりやすいが、過剰はすぐ問題が表面化するとは限らない。いま、結合テストを引き継いだとして、どうも重複に見えるテストケースが存在し、かつ、その修正コストが大変重いものだった、とする。片方を捨てる決断は中々出来ないと思われるが、それは、コストをかけて両方のテストケースを修正するか、一時的にskip-testする(おそらく高い確率でskip-testのままになる)か、それともテストコードを捨てるか、を決めなければならない。
このことから、私は結合テストはまずは正常系のみで十分ではないか、と考えている。もちろん異常系も含むのが望ましいが、それは自動化された結合テストの経験が蓄積されてからでも十分ではないか、と考えている。
自動・手動のバランス
種々の自動化がソフトウェア開発を改善するのは間違いない。あるテストを自動化するか手動のままでいくか、の選択肢が生まれたのも基本的には喜ばしい事ではある。ただ、今度は自動・手動の使い分けという新たな課題が生まれる。
テスト自動化は構築するにも維持し続けるにもコストがかかるのは既に述べた通り。そのコストが見合わないと判断するなら手動のままでいこう、となる。なるのだけど、その判断根拠は何なのかとか、判断してる余裕がプロジェクトに無いとどうしようもないとか、中々に悩ましい場合がある。
感想
ここからは何となく感じた事とか考えたけど実践してはないアイデアだとか単なる感想をあれこれ書いていく。
何を・どのくらいテストすれば良いのか
何を・どのくらいテストすべきか、の難しさはテスト自動化の手法が進歩してもあまり変わらないな、という印象がある。
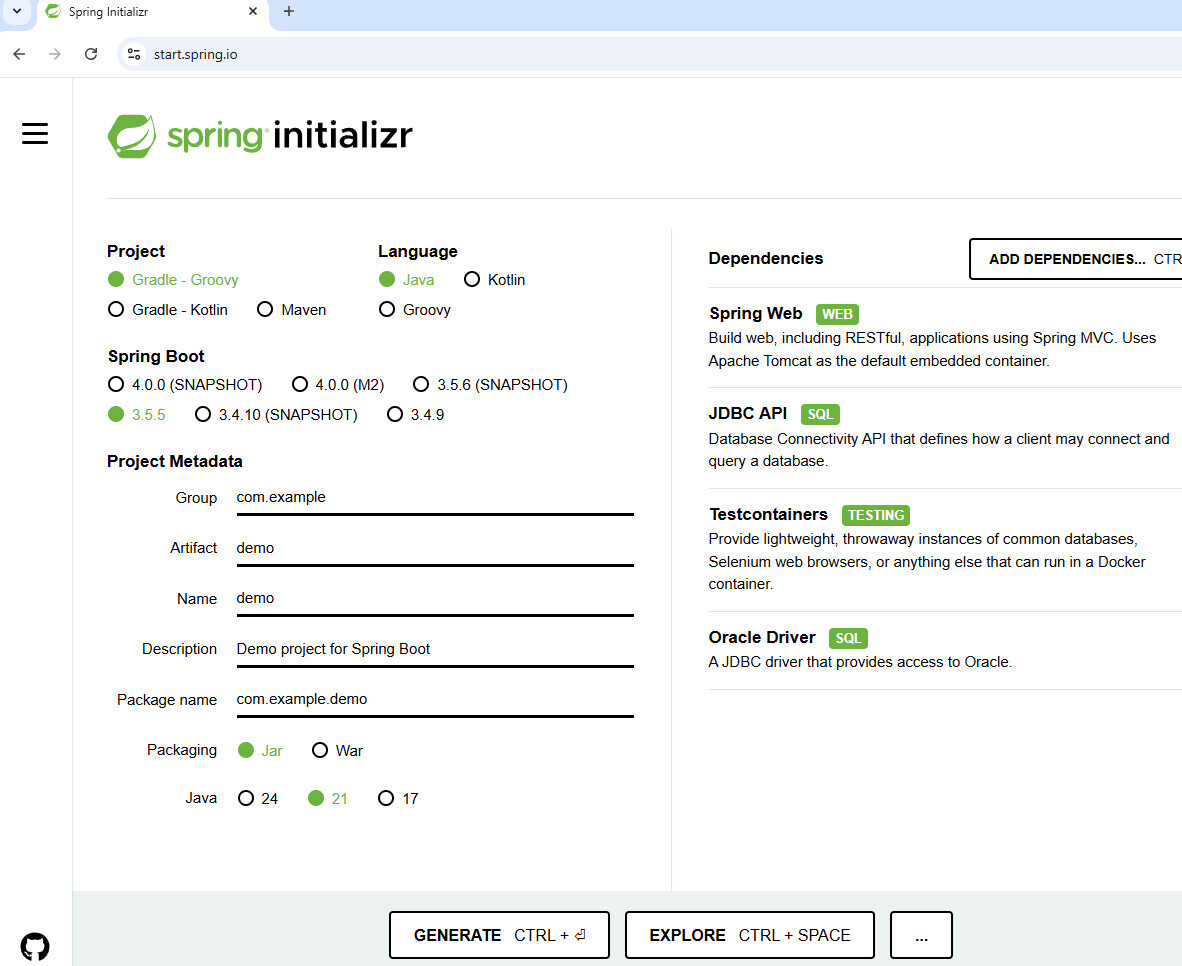
テストコードの実装手段の進歩は本当に目覚ましい。Oracleのdockerイメージを自分でビルドするのが面倒だとボヤいてたらイメージ配布が始まり、Testcontainersを使い始めるのも中々難しいなぁと悩んでいたらSpring InitializrでポチポチするだけでOracleコンテナが起動&終了するスケルトンコードを生成するようになり。気が付けば便利なテスト関連ツールやプロダクトが世にあふれ、いま自分が使用中のライブラリもいつのまにかすごく便利に改良されていたりする。
私の経験談として、あるレガシーコードに少しずつテストコードを整備して単体・結合ともにおおむねカバー出来てさぁ安全に機能修正が可能になったぞ、のタイミングでそのサービス廃止が決まった事がある。結合テストの実行回数を考慮すると、投入コストに対する効果は今一つと判断せざるを得ない事例となった。ユーザが無のシステムをテストしても無。いくらテストコードの実装がラクになろうが、ビジネスサイドと歩調が合わなければ無意味なコストになってしまう。
何をテストすべきかは要求に従う。それを改めて思い知らされた一件だった。
感覚的には、機能要件・非機能要件にスケジュール・予算などプロジェクト要素をパラメータに取る関数のようなものがあり、そこから何をテストすべきか、が導かれるのだろう、と感じる。そこまではいかなくとも、それらの要素に感覚的な点数を付けて評価するで十分かな、とも思う。結合テストだけで言えば、もうちょい柔軟な判断で十分で、引き継いだレガシーシステムの単体テストがおおむね揃ったから次は結合テストいきましょう、とか。この辺の議論は私の能力を越えるところなのでこの辺にしておく。
まずは単体テストを推奨
個人的には、テスト自動化はE2Eテストよりも結合テストよりも単体テストからまずは進める事を推奨する。テストを自動化するとはどういうことか? を単体テストからまずは学ぶのが良い、と考えている。自動化対象のレイヤこそ異なるが、自動化の構造には共通点が多い。
とりわけ個人的に重要と考えるのが失敗時のダメージが少ない点。たとえば、過剰な結合テストを作成すると、テストコードの修正が単体テストと比較すると桁違いの苦労が上乗せされるし、削除するにも本当に不要かどうかの調査が必要になったり、自動化の恩恵を実感する前に疲れてしまっては元も子もない。結合テストに比べれば単体テストは多少過剰でもそこまでの問題にはならない。いずれスローテストやテストケース重複等の問題が発生するだろうけど、その対処からも自動化とは何なのかを学習する事が重要に思う。
そもそも単体テストの習得が難しい。ユニットテスト基礎講座 - JJUG CCC 2025 Spring 登壇資料の資料が非常に優秀である。まずは本資料を十分に理解し、かつ、日々の開発で活用できるようにする。結合テストの自動化はそれからで十分と考えている。
疑似コードのとおり、単体・結合共にテストケースの構造は準備・実行・検証と変わらない。従って、テストコードの基本的な作成方法は両者で同一であり、単体テストで培ったスキルをそのまま流用出来る。その点からもまずは単体テストから学習し始める事を推奨する。
まずは正常系のみの結合テストを推奨
経験的に、結合テストはまずは正常系のみで十分、と考えている。理想的には、手動・自動問わずテストケースを洗い出した上で自動化対象をピックアップが望ましいが、対象システムの仕様をある程度習熟していれば現実的にそこは一旦スキップでも良いだろう。web-apiであればエンドポイントごとに正常系を1つか2つ。あとは仕様変更時などのタイミングで「ここは結合テストのカバー範囲を広げたいな」となったら増やす、で良いと考えている。
とはいえ、この辺の判断の感覚は人それぞれチームそれぞれ状況次第だろうな、とも思う。たとえば、私の結合テスト体験はレガシーコードへの導入ばかりで、自動化を前提とした新規システム設計の視点が欠落しているという自覚がある。レガシーコードのテスト自動化を推進したいが、かといって負担の上乗せは可能な限り減らしたい、という保守的な設計思想がベースにある。
平たく言えば、ただでさえレガシーコードのお守りで疲れてるのに、自動化疲れとでも言うものを上乗せしてしまうのは避けたいよね、といったところ。
外部システム連携部分の単体テストを結合テストでカバー
私は外部システムの連携部分に対する単体テストを書かず結合テストで包括するようになった。具体的には、以下で述べる@Contoller・@Repositoryやkafka・redis等との通信部分が該当する。
SQLのテストコードの議論
個人的には、SQLのみのテストコードは原則的に不要では、と考えている。
結合テストはその性質的にすべてのSQLをカバーするはずなので、テストしたいSQLをカバーするテストケースになるよう工夫するのが望ましい。複雑なSQLをカバーしたければ、その分だけ結合テストも厚くする。ただ、過剰な結合テストは別の問題を生むので、バランスは考える必要がある。
もし要件が複雑なSQLを必要とする場合、SQLのみのテストコードが妥当なケースもあるとは思う。ただ、結合テストと重複するテストケースとの住み分けには注意が必要だろう。過剰にテストコードを作り込むと機能修正時の負担が大きくなり過ぎてしまう。
@Contollerのテストコードの議論
個人的には、@Contollerのみに対する単体テストは不要では、と考えている。
ただ、@Contollerにロジックが大量に書かれているとか、ヘッダーやステータスコードの分岐が複雑だとか、場合により単体テストを選択するケースはありうる。とはいえ、@Contollerに複雑なロジックが存在する事が問題なので理想的には分離が望ましいだろう。たとえば、ステータスコード決定クラスを分離して単体テストを記述、薄くなった@Contollerを結合テストで包括、がベターではないか。
結合テストが設計の要改善を示唆
単体テストにおいて、このメソッドはどうもテストコードが記述しにくい、となるケースはクラス設計が要改善を示唆する事が多い。同様に、結合テストにおいても、このweb-apiやjobはどうもテストコードが記述しにくい、となるケースがある。この場合、それらの設計やテーブル設計の要改善を示唆しているのでは? と感じる事が多い。
設計時点で結合テスト観点から見直す
単体テストにおいて、この戻り値・引数ならテストコードはこうなるがテストコードの観点からはそれらの改善が望ましい、となるケースは多々ある。従って、結合テストにおいても、web-api・job・テーブル設計の時点でテストコード観点から見直しする事で設計改善に繋げられる可能性も高いのではないか? と感じる。
理想的には、設計時点で結合テストの初期データ・テストケースの定義が出来ると望ましいが、それらの当たりくらいはつけられるだろう。結合テスト観点から設計を眺めると、たとえば、外部依存web-apiの契約ではなく実装に依存するテストケースを記述しようとする場合はそれらweb-apiの分割単位は適切ではない、かもしれない。また、初期データが複数機能で重複していたりカラムがnullのデータがやたら多い場合はテーブル設計が適切ではない、かもしれない。
従来、いわゆるテストは開発工程の最後にまとめてやるもの、という認識が強かった。しかしながら、単体テストの自動化は実装・単体テストを同時に完了する、という転換をもたらした。これは今まで後工程でやっていたものが前工程に移動またはマージされた事を意味する。もし結合テストの自動化が一般的なものになっていけば、同様な転換が可能になるだろう、という期待がある。
初期データの作成・修正困難がテーブル設計の要改善を示唆
初期データ修正が厄介なケースはいくらでも挙げられると思うが、テーブル設計に改善が必要な事を示唆するケースも多いのでは、と感じる。
たとえば列数が多いテーブルの初期データの準備および修正は大変なことが多い。あるテストケースで動作させるためだけにデータは入れておく必要があるとか、無関係な沢山のカラムをnullで埋めておく必要があるとか、色々ある。こういう初期データを修正するとき、多量のnullとか純粋に作業が面倒だし、テストケースに必要な初期データかどうかパッと見不明確でイチイチ確認する必要がある、とかも面倒である。
典型的なテーブル設計改善の事例として、ある二つの機能が一つのテーブルを更新するがその二つの機能の更新カラムが完全に異なる場合、それぞれの機能ごとの更新カラムを有する二つのテーブルへ分割が望ましい。こうすると、初期データも各機能が必要とするテーブルのみで済む。機能修正時も片方の初期データがもう片方に影響を与えなくなる。
もちろん上はかなり恣意的な例ではある。ただ、経験的に、テーブル設計がまずくてアプリケーションもまずくなりテスト自動化もかなりまずい事になり、という負の連鎖の存在は確かなように感じられる。
しかしながら、結合テストの改善にはテーブル設計の改善が必要だが、テーブル設計の改善には結合テストの改善が必要で、そのためにもテスト自動化でまず現行動作の保存が必要で……と、堂々巡りになり、良くない事が分かっていても現実的に手を出せない事が多いのも事実ではある。
結合テストで単体テストの置換可能性
もし結合テストが単体テストの要件をすべて満たすなら、結合テストのみは現実的かもしれない。
たとえばテストの高速性を考える。OracleコンテナはTestcontainersのreuse、初期データのロードを差分で最小限にする、など工夫をすれば、まぁ個人の感覚差はあるだろうが、十分に高速な結合テストの体験は可能かもしれない。毎回コンテナ再作成でも高速起動するミドルウェアならこの点は問題にならないし、近年のテスト技法の進展を見るに、結合テストがさらにお手軽に高速になる可能性は十分高い。
結合テストのポータビリティとか再現性とかはちょっと気になる。コンテナをキャッシュし続けたままだと、いざサーバでゼロからビルドしたらテストコードが思わぬエラーになった、みたいな事態は起こらないだろうか。ローカルにはデータが残存していたとか、テーブル等の定義が古いままだったとか。キャッシュの弊害がテストコードの安定性にどのくらい影響与えるのか? は私自身は良く分かっていない。ただまぁ、この辺はチーム内でコンセンサスが取れてれば現実的には問題にはならないかもしれない。
実際に私の遭遇したケースとして、このジョブはほぼSQLで出来ておりアプリケーション側のロジックはほとんど無い。そのため、単体テストは薄くして結合テストを厚くしよう、とした事がある。アプリケーション側に単体テストで網羅したくなる細かな条件分岐が無いので、結合テストでそれをカバーするテストケースがあれば十分だろう、という判断をした。
とはいえ、現時点ではまずは単体テストと結合テストの使い分けを出発点にするのがベターだろう。もちろん、すでにテスト自動化を習熟して自信があるなら、単体テストと結合テストのバランス調整に取り組むのが良い。結合テストに取り組んで分かった事だが、複数種類のテスト自動化の組み合わせにより全体をカバーするというやり方はかなり魅力的である。
テストピラミッドの上から取り組む方法の可能性
ただ、例外的にソースコードに手を入れられない場合はその限りではない、かもしれない。例えば、開発チームとは全く別組織のチームが何等かの事情で品質向上を担当せざるを得ない場合、単体テストの整備をスキップして結合テストやE2Eテストから取り組み始めるケースはあるかもしれない。
結合テストの並列実行による高速化
私はこれに取り組んだ事が無いので想像でしかないが、条件次第では可能だが、結合テストでは重要度は低いのではないか? と感じている。
まず、readのみ、かつ、テスト開始前にすべての初期データをロード可能であれば、テストケースの並列実行は容易だろう。逆にwriteは難しいだろう。ミュータブルなクラスのテスト並列実行と似たようなもので、何らかの工夫をすれば可能だろうけど、凝ったテストコードは色々な点で避けるべきだろう。並列実行が機能要件であるならば様々な工夫は必要かもしれない。長時間を要するテストは夜間にまとめて実行、とかの方が現実的かもしれない。
結合テストの量は単体テストよりもずっと少なくなるはずで、テストの実行時間もそれほど要せず、従って並列実行の重要度・優先度は低いのではないか? と私は現段階では考えている。もちろんケースバイケースで、たとえば単体テストを廃して結合テストにすべて寄せているなら、その限りでは無い。
また、高度なテストコード技法が必要な場合、まずアプリケーションの設計を高度にする必要があるのかもしれない。
CQRSとテスト容易性
私はCQRSに取り組んだ事が無いので想像でしか無いが、query側はそういうデータが入ってるものとしてテストする。command側はミドルウェアのイベント集合が結果的にどうなるかをテストする。結合テストに取り組んでいると、テストの書きやすさとread/writeの分離は明らかに関係がある。アーキテクチャのレベルでそれらを分離するアプローチはテスト自動化においても高い有用性がある、と感じている。
もちろん両者を統合したテストも必要ではあるが、積み上げ方式の方がコントロールしやすい。統合テスト一本鎗よりも、read/writeそれぞれで結合テストを積み上げて統合テストは薄くする、の方が開発者としてはずっとコントロールしやすいだろう。
そこまで高度な仕組みではなくもっと素朴な仕組みでも十分である。たとえば、本エントリでも扱った、readのweb-apiとwriteのbatch、という伝統的なシステム分割手法でも十分効果的である。
テクニカル過ぎるテストコードは良くない兆候
レガシーコードがややこしいとテストコードもややこしい事をせざるを得ないケースは多いが、あまりに度が過ぎるとテストコードが新たな重しとなり引継ぎ不可能になりかねない。よく分からないエラーでビルド不能になるのでテストコードをdisabledしました、という悲しい結末を避けるためにも、自動化にこだわり過ぎず手動でもまぁええか、の精神は必要に思う。
まぁでも自動化を作りこんでいくのは独特の中毒性がありやり過ぎてしまう気持ちは分からなくもない。私は神経質的な性格の自覚があり、こういうタスクと非常に相性が良く楽し過ぎてやり過ぎるのは本当に良くないな、とは理解しているのだが……
役割を終えたTestcontainers以前の代替テクニック
個人的には、結合テストを本番同等のOracle等ではなく組込DBで代替する方法は過去の手法となった。ちょっと昔は個人のPCでdocker等で本番同等のOracle等ミドルウェアを簡単に動作するのは高コストだったため代替手段として組込DBを使用していた。しかし、本番同等のミドルウェアでテストするメリットがコストのデメリットを上回ったと現時点で判断してよいだろう。
また、spring-bootはテストケース実行後に自動でrollbackする機能があるが、これも個人的には結合テストで使用しなくなった。結合テストはcommitまで正常完了するかどうかも確認したいためである。とはいえ、開発時に更新系を何度も実行確認したいとか、本機能が有用なケースはあるだろう。
さいごに - テスト自動化は現実を見ないと夢を見れない
レガシーコードへのテスト自動化の導入は安全な機能修正や開発速度の改善などいわゆる塩漬け対策の一つとして有用であり夢のある技術な事は確かである。一方で、その導入には、テスト自動化技術の習得だけでなく、対象システムの仕様と技術、失伝したかもしれない固有の暗黙的知識、など幅広い知識が必要となり、厳しい現実の直視が必須でもある。
手動テストならふわっとした依頼でも何とかなっていたが、自動化ではテストコードとして厳密な手順の定義が必須となる。人間はなんだかんだ柔軟なので「テストして下さい」と依頼すれば、環境が無ければセットアップするし、テストケースが少々あいまいでも補完するし、期待値の検証も成功・失敗を文脈から判断してくれる。テスト自動化ではそうはいかない。手動のふわっとを厳密なテストコードとして記述が必要で、結合テストは単体テストの何倍も複雑な記述となる。
自動化、特にレガシーコードの結合テスト自動化は、厳しい現実を直視出来さえすれば高いコストに見合うメリットが得られる、と考えている。
参考文系
- 単体テストの考え方/使い方 プロジェクトの持続可能な成長を実現するための戦略
- ソフトウェアテスト徹底指南書 - 開発の高品質と高スピードを両立させる実践アプローチ
- システムテスト自動化 標準ガイド
- Javaエンジニアのための ソフトウェアテスト実践入門 - 自動化と生成AIによるモダンなテスト技法 -
- マイクロサービスパターン 実践的システムデザインのためのコード解説
- レガシーコード改善ガイド
*1:私はCQRSとかイベントソーシングとかをあまり理解してないため、ここではゴッチャに扱ってしまっている点は容赦願いたい