kagamihogeの日記

kagamihogeの日記です。

Eclipse + Payara + SOAP Web Service

検証用の適当なSOAP Web Serviceが必要になったので試しにPayaraで作成した時のメモ。

事前準備

各種ソフトウェアのダウンロード。

各種手順

EclipseのPayara設定

EclipseのHelp -> Eclipse Market PlaceでPayara Toolsをインストール。payaraで検索すれば出てくる。

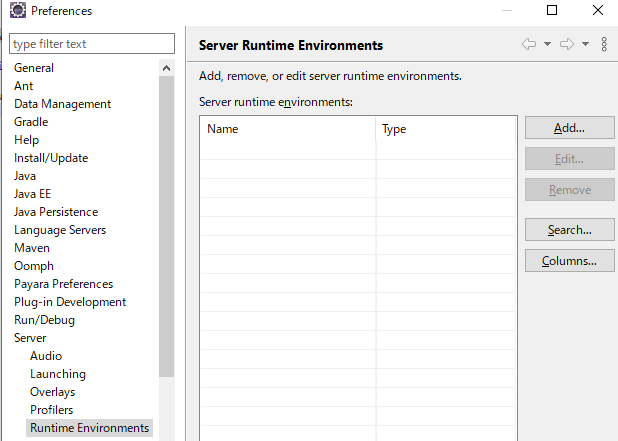
Payaraのserver設定。Window -> Preferences -> Server -> Runtime EnvironmentsでAdd

Payaraを選択する。

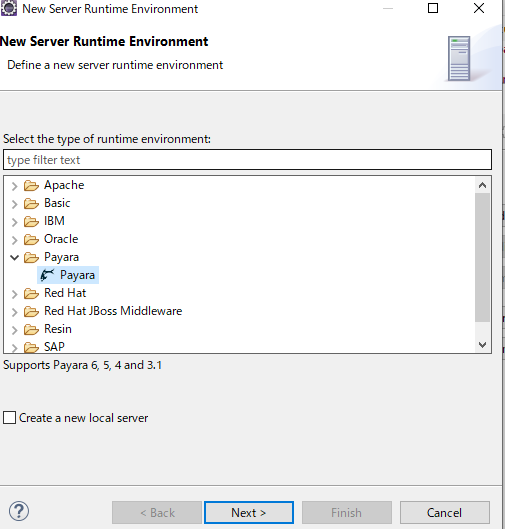
Parayaのディレクトリを選択する。Javaも必要に応じてjdkのインストールディレクトリを選択する。

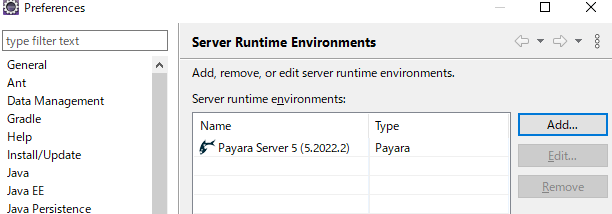
Paraya Serverが追加されればOK

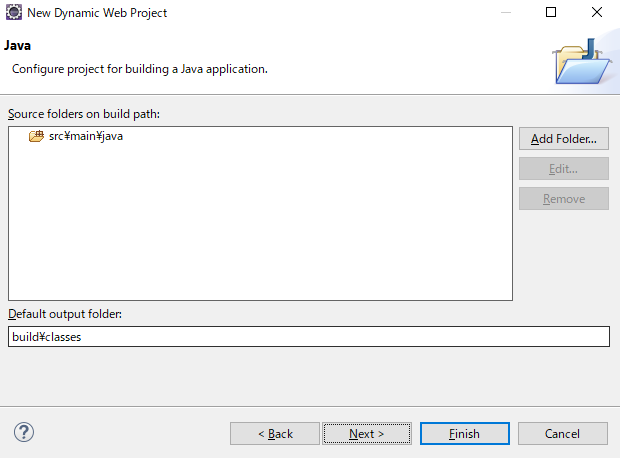
Dynamic Web Projectを作る

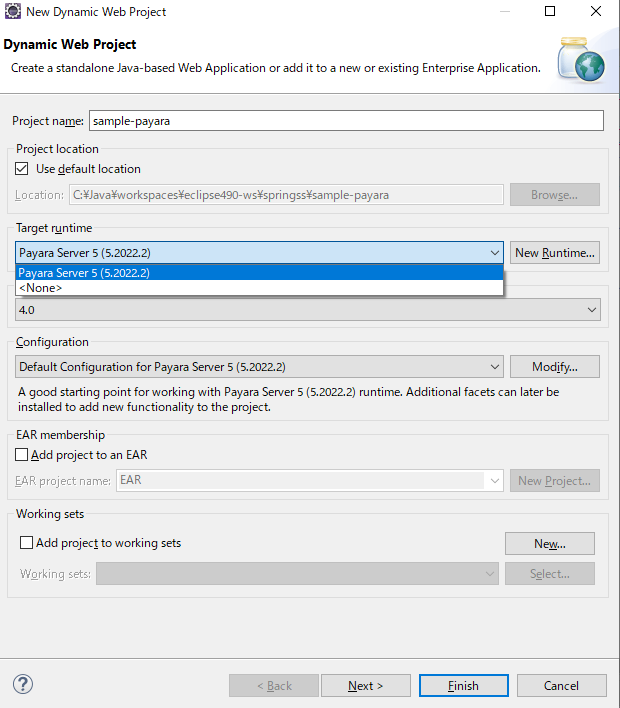
File -> New -> Dynamic Web Projectを選ぶ。Project nameを適当にここではsample-payaraと入力、Target Runtimeには上で作成したPayara Serverを選ぶ。
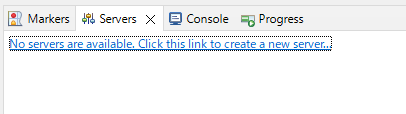
Server設定

Serverビュー(無ければWindow -> Show View -> Serversで開く)のClick this links ...をクリックする。
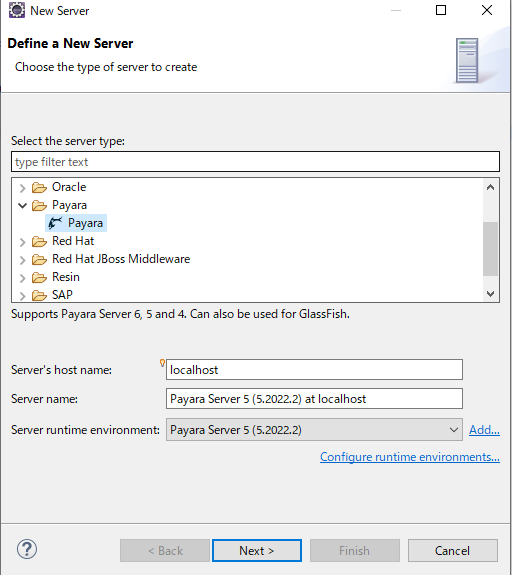
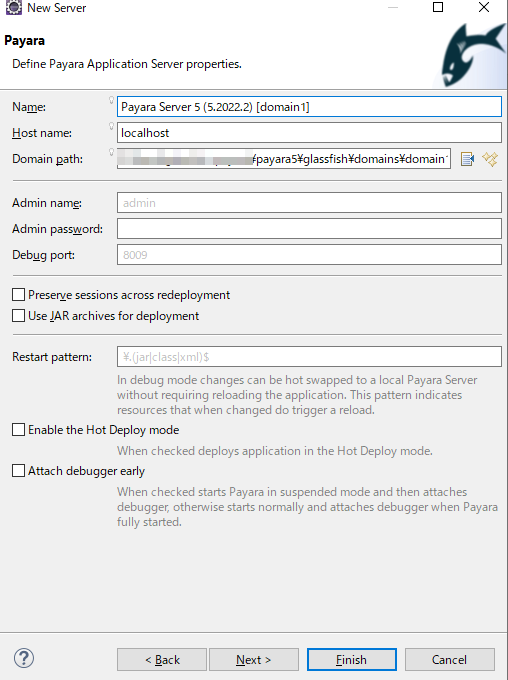
Payaraを選ぶ。

上で作成したsample-payaraプロジェクトをAddする。

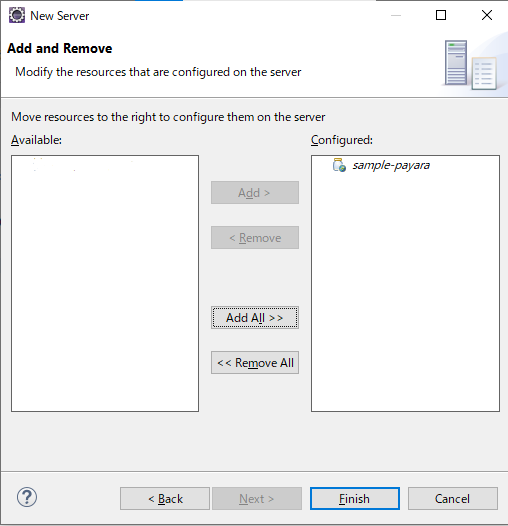
プロジェクトが追加されたらServerはこうなる。

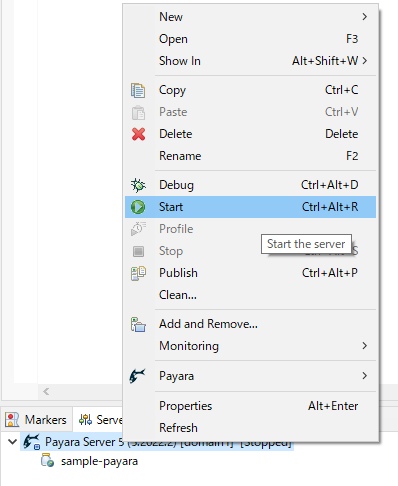
Payara Server右クリック -> Startで起動。

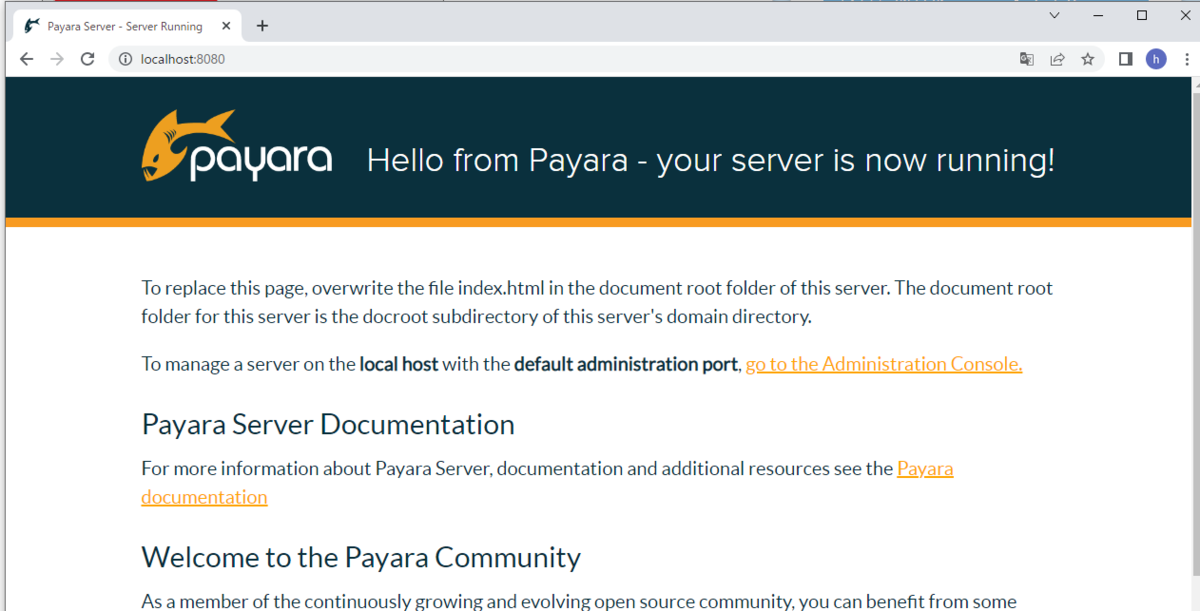
http://localhost:8080/ でhelloページが開けばOK。

適当なWeb Service作成

https://tomee.apache.org/examples-trunk/simple-webservice/ソースコードを丸ごとコピーさせてもらう。

package sample;

import javax.jws.WebService;

@WebService(targetNamespace = "http://superbiz.org/wsdl")
public interface CalculatorWs {

  public int sum(int add1, int add2);

  public int multiply(int mul1, int mul2);
}
package sample;

import javax.ejb.Stateless;
import javax.jws.WebService;

@Stateless
@WebService(portName = "CalculatorPort", serviceName = "CalculatorService", targetNamespace = "http://superbiz.org/wsdl", endpointInterface = "sadfasdf.CalculatorWs")
public class Calculator implements CalculatorWs {
  public int sum(int add1, int add2) {
    return add1 + add2;
  }

  public int multiply(int mul1, int mul2) {
    return mul1 * mul2;
  }
}

http://localhost:8080/CalculatorService/Calculator?wsdlWSDLxmlが見られればOK。

動作確認

curl(実際にはpostmanを使用)で動作確認。

curl --location --request POST 'http://localhost:8080/CalculatorService/Calculator' \
--header 'Content-Type: text/xml' \
--data-raw '<?xml version="1.0" encoding="UTF-8"?>
<soap:Envelope xmlns:soap="http://schemas.xmlsoap.org/soap/envelope/">
  <soap:Body>
    <ns1:sum xmlns:ns1="http://superbiz.org/wsdl">
      <arg0>4</arg0>
      <arg1>6</arg1>
    </ns1:sum>
  </soap:Body>
</soap:Envelope>'

下記のレスポンスが返ればOK。

<?xml version='1.0' encoding='UTF-8'?>
<S:Envelope xmlns:S="http://schemas.xmlsoap.org/soap/envelope/">
    <S:Body>
        <ns2:sumResponse xmlns:ns2="http://superbiz.org/wsdl">
            <return>10</return>
        </ns2:sumResponse>
    </S:Body>
</S:Envelope>

WireMockのResponse Templatingでレスポンスを動的に書換

WireMockresponse-templatingによりレスポンスを書き換えられる。以下にspring-bootの@SpringBootTestを前提にしたサンプルコード・使い方について書く。

ソースコード

build.gradle

plugins {
    id 'org.springframework.boot' version '2.7.2'
    id 'io.spring.dependency-management' version '1.0.11.RELEASE'
    id 'java'
}

group = 'com.example'
version = '0.0.1-SNAPSHOT'
sourceCompatibility = '17'

configurations {
    compileOnly {
        extendsFrom annotationProcessor
    }
}

repositories {
    mavenCentral()
}

ext {
    set('springCloudVersion', "2021.0.3")
}

dependencies {
    implementation 'org.springframework.boot:spring-boot-starter-webflux'
    compileOnly 'org.projectlombok:lombok'
    developmentOnly 'org.springframework.boot:spring-boot-devtools'
    annotationProcessor 'org.projectlombok:lombok'
    testImplementation 'org.springframework.boot:spring-boot-starter-test'
    testImplementation 'org.springframework.cloud:spring-cloud-starter-contract-stub-runner'
    
}

dependencyManagement {
    imports {
        mavenBom "org.springframework.cloud:spring-cloud-dependencies:${springCloudVersion}"
    }
}

tasks.named('test') {
    useJUnitPlatform()
}

application.properties

外部APIを想定したテストなのでsrc/main/resources/application.propertiesにURLを定義しておく。自動テスト実行時にはWireMockのモックサーバーのURLになる。

external.api.url=http://localhost:12345

java

パスをそのままWireMockに投げてレスポンスもそのまま返すだけのマッピングを作っておく。

import org.springframework.boot.SpringApplication;
import org.springframework.boot.autoconfigure.SpringBootApplication;
import org.springframework.core.env.Environment;
import org.springframework.web.bind.annotation.GetMapping;
import org.springframework.web.bind.annotation.RestController;
import org.springframework.web.reactive.function.client.WebClient;
import org.springframework.web.server.ServerWebExchange;

import reactor.core.publisher.Flux;

@RestController
@SpringBootApplication()
public class SampleWireMockApplication {
  WebClient client;
  
  SampleWireMockApplication(WebClient.Builder webClientBuilder, Environment env) {
    this.client = webClientBuilder.baseUrl(env.getProperty("external.api.url")).build();
  }

  @GetMapping("/**")
  public Flux<String> sample(ServerWebExchange exchange) {
    return client
        .get().uri(exchange.getRequest().getPath().value())
        .retrieve()
        .bodyToFlux(String.class);
  }

  public static void main(String[] args) {
    SpringApplication.run(SampleWireMockApplication.class, args);
  }
}

SpringBootTestのテストコード

上記のcontrollerにアクセスしてレスポンスを返すだけのテストコードを書く。本来はここで各種expectをするのだけど今回そこは主題ではないので省略する。

import org.junit.jupiter.api.Test;
import org.springframework.beans.factory.annotation.Autowired;
import org.springframework.boot.test.context.SpringBootTest;
import org.springframework.boot.test.context.SpringBootTest.WebEnvironment;
import org.springframework.cloud.contract.wiremock.AutoConfigureWireMock;
import org.springframework.test.web.reactive.server.WebTestClient;

@SpringBootTest(properties = {
    "external.api.url=http://localhost:${wiremock.server.port}" },
    webEnvironment = WebEnvironment.RANDOM_PORT)
@AutoConfigureWireMock(port = 0)
public class ApplicationTest {

  @Autowired
  WebTestClient client;

  @Test
  void testSample() {
    String result = client
        .get().uri("/hoge")
        .exchange()
        .returnResult(String.class)
        .getResponseBody()
        .blockFirst();
    System.out.println(result);
  }
}

WireMock

mapping

/src/test/resources/mappings/sample-mapping.json マッピングファイルを作る。

{
  "request": {
    "method": "GET",
    "urlPathPattern": "/(.*)"
  },
  "response": {
    "status": "200",
    "body": "{{request.path}}",
    "transformers": ["response-template"]
  }
}

実行結果

これを実行するとレスポンスに/hogeと返ってくる。

response-template

基本的な使い方

まずtransformersresponse-templateの追加が必要。これによりresponse-templatingのThe request modelの各種組み込み変数やhelper関数が使用可能となる。以降、マッピングファイルのサンプルコードはresponse部分のみに省略。

  "response": {
    "status": "200",
    "body": "{{request.path}}",
    "transformers": ["response-template"]
  }

ボディファイルを動的に変更

例えば、以下のようにパスで返すボディファイルを変更したい、とする。

  • /hoge.json -> __files/sample/hoge.json
  • /foo.json -> __files/sample/foo.json
  "response": {
    "status": "200",
    "bodyFileName": "sample/{{request.path.[0]}}",
    "transformers": ["response-template"]
  }

ボディファイルの中身を動的に変更

ボディファイルの中身にも{{request.path.[0]}}などを書ける。

まず以下のようにボディファイルを返すマッピングを作る。

  "response": {
    "status": "200",
    "bodyFileName": "sample/foo.json",
    "transformers": ["response-template"]
  }

次にボディファイルの中身をリクエストパスで動的に書き換える。

{
  "id": "{{request.path}}"
}

これで例えば/hoge-pathにアクセスするとレスポンスボディは{ "id": "/hoge-path"}が返ってくる。

ドキュメント

DGS Frameworkのチュートリアルレベルをやる

DGS FrameworkNetflixのGraphQLサーバのためのspring-bootベースのフレームワークhttps://netflix.github.io/dgs/getting-started/チュートリアルをやる。

やったこと

build.gradle

https://start.spring.io/ でベースを作ったあとにチュートリアルのページに書いてある依存性を追加する。

plugins {
    id 'org.springframework.boot' version '2.7.0'
    id 'io.spring.dependency-management' version '1.0.11.RELEASE'
    id 'java'
}

group = 'com.example'
version = '0.0.1-SNAPSHOT'
sourceCompatibility = '17'

repositories {
    mavenCentral()
}

dependencies {
    implementation(platform("com.netflix.graphql.dgs:graphql-dgs-platform-dependencies:latest.release"))
    implementation("com.netflix.graphql.dgs:graphql-dgs-spring-boot-starter")

    developmentOnly 'org.springframework.boot:spring-boot-devtools'
    testImplementation 'org.springframework.boot:spring-boot-starter-test'
}

tasks.named('test') {
    useJUnitPlatform()
}

GraphQLのスキーマを追加する。デフォルトではsrc/main/resources/schemaスキーマファイルを作るので、src/main/resources/schema/schema.graphqls を作成する。スキーマの中身はこのチュートリアルではなく https://docs.spring.io/spring-boot/docs/current/reference/html/web.html#web.graphql.schema からコピペした。

type Query {
    greeting(name: String! = "Spring"): String!
    project(slug: ID!): Project
}

""" A Project in the Spring portfolio """
type Project {
    """ Unique string id used in URLs """
    slug: ID!
    """ Project name """
    name: String!
    """ URL of the git repository """
    repositoryUrl: String!
    """ Current support status """
    status: ProjectStatus!
}

enum ProjectStatus {
    """ Actively supported by the Spring team """
    ACTIVE
    """ Supported by the community """
    COMMUNITY
    """ Prototype, not officially supported yet  """
    INCUBATING
    """ Project being retired, in maintenance mode """
    ATTIC
    """ End-Of-Lifed """
    EOL
}

エントリーポイントのmainを作る。

import org.springframework.boot.SpringApplication;
import org.springframework.boot.autoconfigure.SpringBootApplication;

@SpringBootApplication
public class BootGraphqlApplication {
  public static void main(String[] args) {
    SpringApplication.run(BootGraphqlApplication.class, args);
  }
}

スキーマのtypeとenumに対応するデータ入れるためのクラスを作る。

public record Project(String slug, String name, String repositoryUrl, ProjectStatus status) {}

public enum ProjectStatus {
  ACTIVE, COMMUNITY, INCUBATING, ATTIC, EOL
}

queryを実装する。Spring for GraphQLと異なり@Controllerは要らない。

import com.netflix.graphql.dgs.DgsComponent;
import com.netflix.graphql.dgs.DgsQuery;
import com.netflix.graphql.dgs.InputArgument;

@DgsComponent
public class ProjectDataFetcher {
  @DgsQuery
  public String greeting(@InputArgument String name) {
    return "Hello, " + name + "!";
  }

  @DgsQuery
  public Project project(@InputArgument String slug) {
    return new Project(slug, "asdf", "sadf", ProjectStatus.ACTIVE);
  }
}

起動したら http://localhost:8080/graphiql でGraphQLのUIにアクセスできる。

参考URL